Want to sharpen your cloud hacking skills? This hands-on guide walks you through setting up a full-featured AWS pentesting lab on Kali Linux. You’ll learn how to configure budget alerts to avoid surprise charges, install and configure essential tools like AWS CLI, CloudGoat, and Pacu, and prepare your environment for ethical hacking practice. This setup gives you a safe, controlled cloud playground to hone your skills.
Prerequisites
- Create a Free Tier AWS Account
- Kali Linux VM
Setting Up Budget Alerts
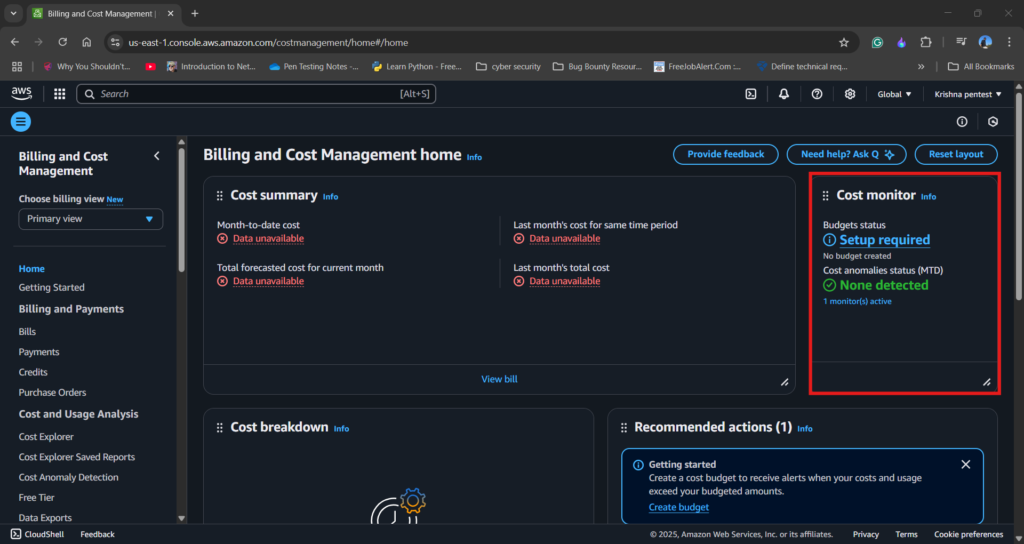
1. Log in to the AWS Management Console.
2. In the top search bar, type “Billing and Cost Management” and select it from the results.
3. Navigate to the Cost Monitoring section.
4. Click on “Set up required” to begin creating your budget.
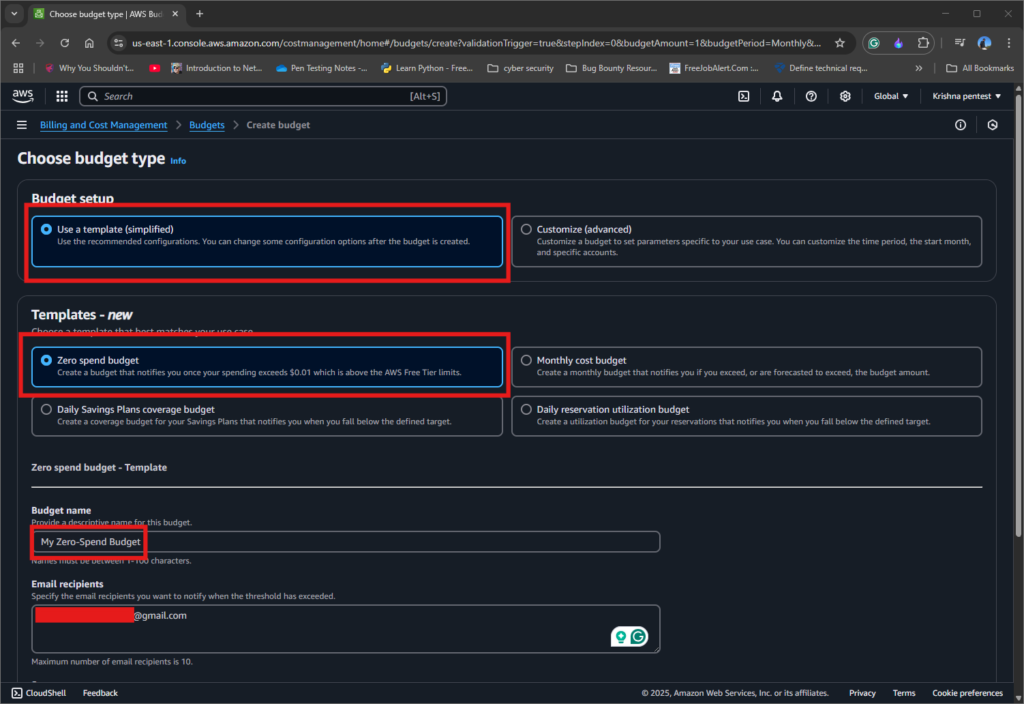
5. Choose “Use a template”.
6. Select “Zero Spend Budget” from the available templates — perfect for free-tier users or lab setups.
7. Enter a budget name of your choice and provide your email address for alert notifications.
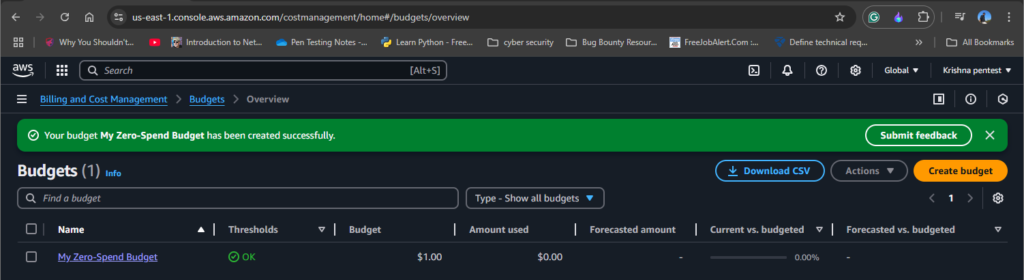
8. Click Create to finalize your budget alert.
Your budget alert is shown on the dashboard.
Installing AWS CLI on Kali Linux
1. Go to the official AWS CLI install page and select Linux.
2. Copy the installation command.
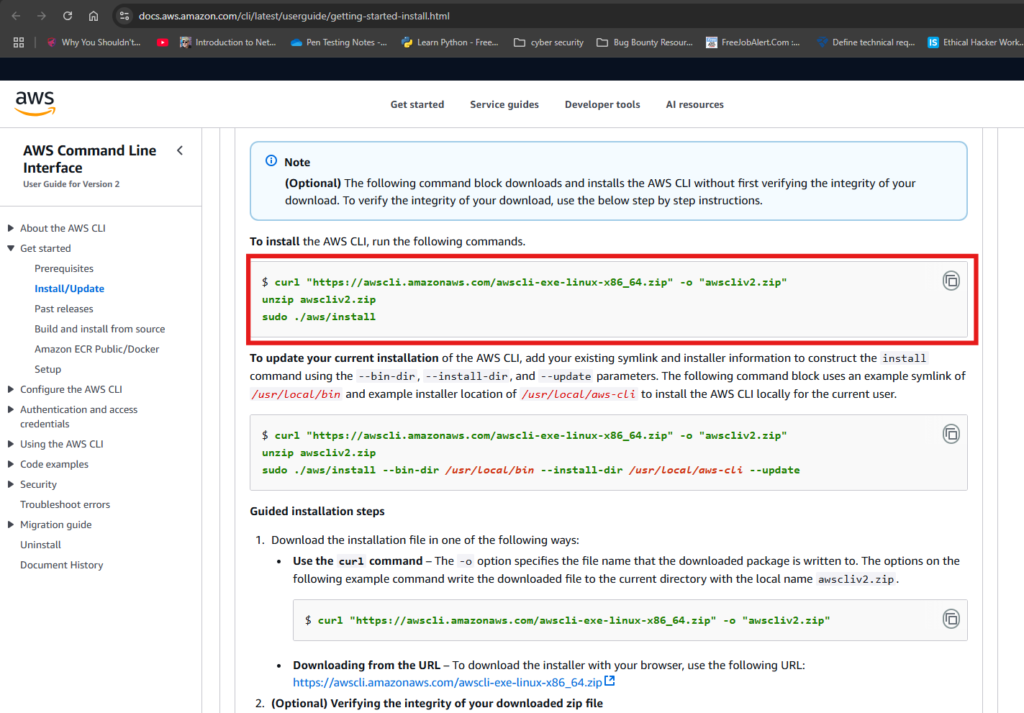
3. Paste it into your Kali Linux terminal.

4. Run aws --version

AWS CLI is installed successfully.
Installing CloudGoat on Kali Linux
Prerequisites
- Python 3.9 or higher (Pre-installed in Kali Linux)
- AWS CLI (Refer above steps)
- Terraform
jq(command-line JSON processor)pipx(for Python package isolation)
Step 1: Install Terraform
1. Visit the official Terraform download page: developer.hashicorp.com/terraform/install
2. Download the Linux AMD64 binary.
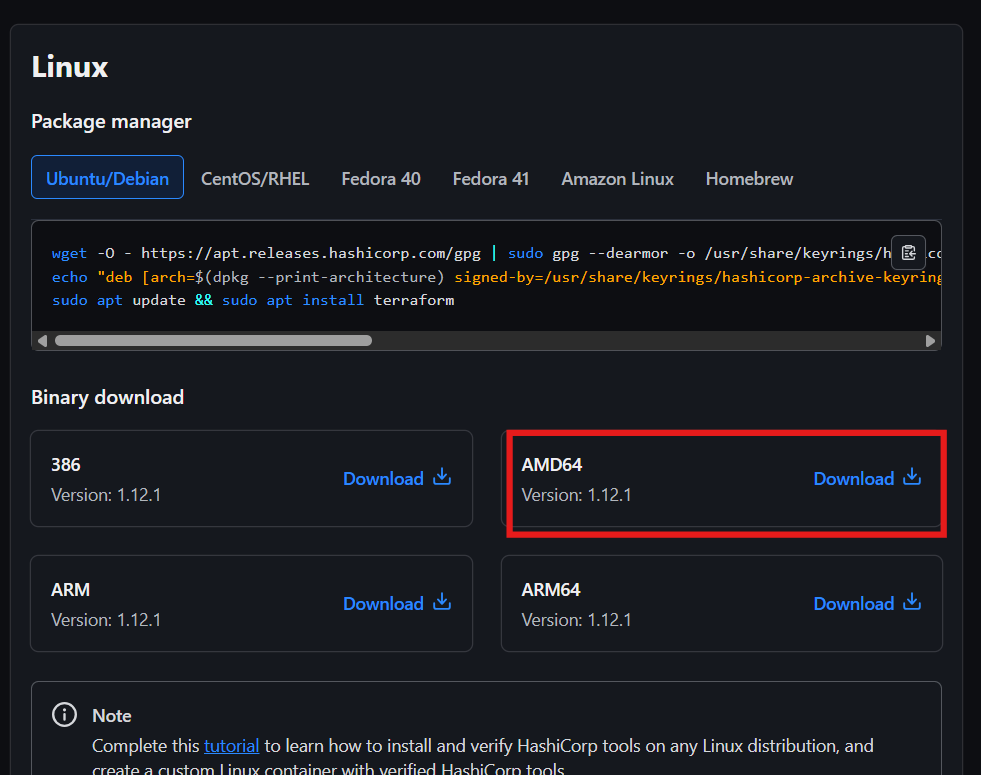
3. Unzip and move the binary to your system path.
unzip terraform_1.12.0_linux_amd64.zip
cp terraform /usr/local/bin
Step 2: Install jq
Install jq
sudo apt install jq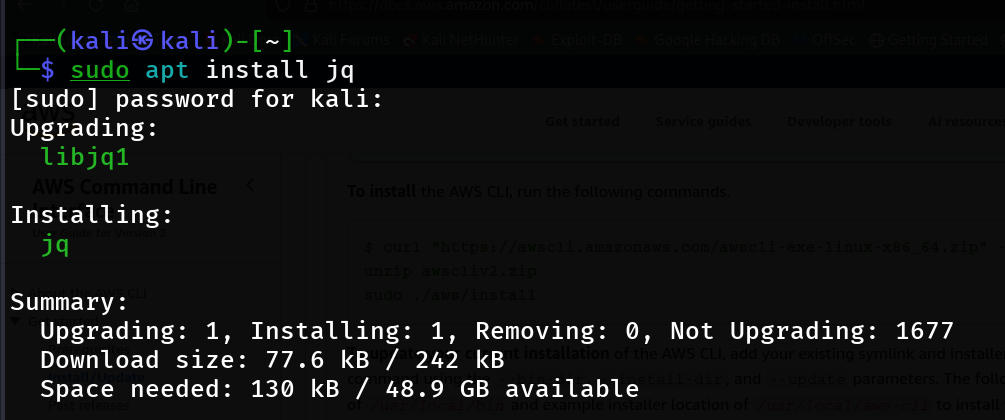
Step 3: Install CloudGoat Using pipx
Install CloudGoat from GitHub in an isolated environment:
pipx install git+https://github.com/RhinoSecurityLabs/cloudgoat.git
Step 4: Create an IAM User in AWS
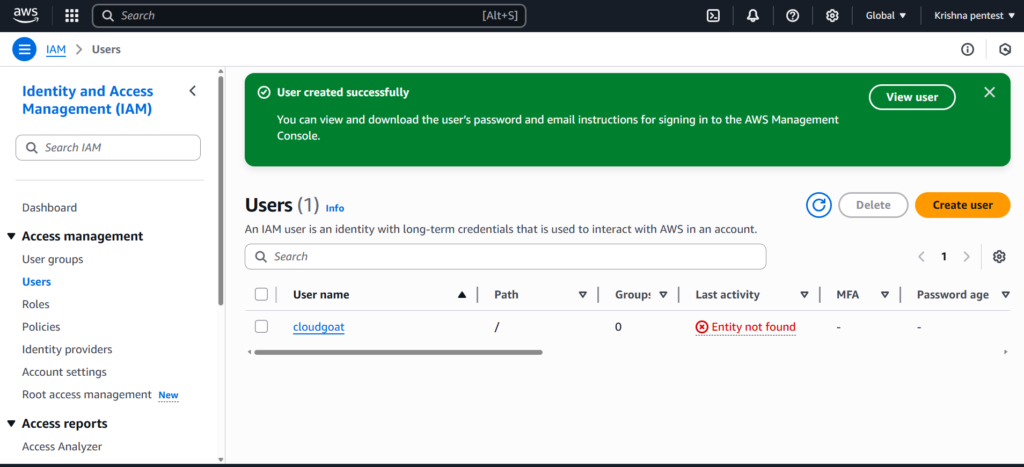
1. Sign in to your AWS Console.
2. Navigate to IAM and create a new user. Name it cloudgoat.
3. Do not enable console access.
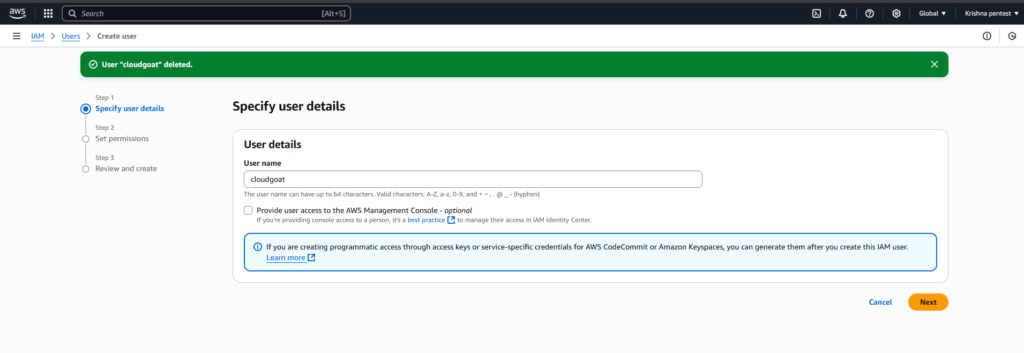
4. Attach the AdministratorAccess policy directly to this user.

A new user is create Successfully.
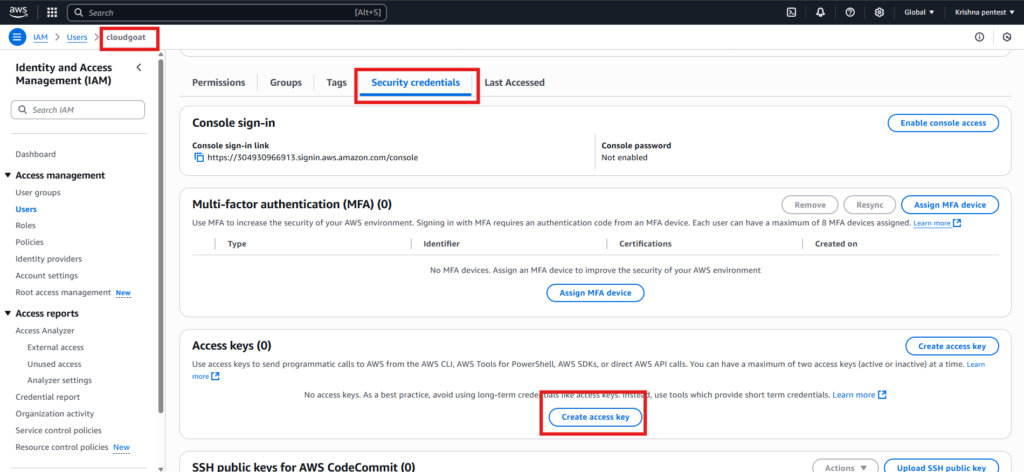
Step 6: Generate IAM Credentials
1. Go to the Security credentials tab of the IAM user.
2. Create a new Access Key.
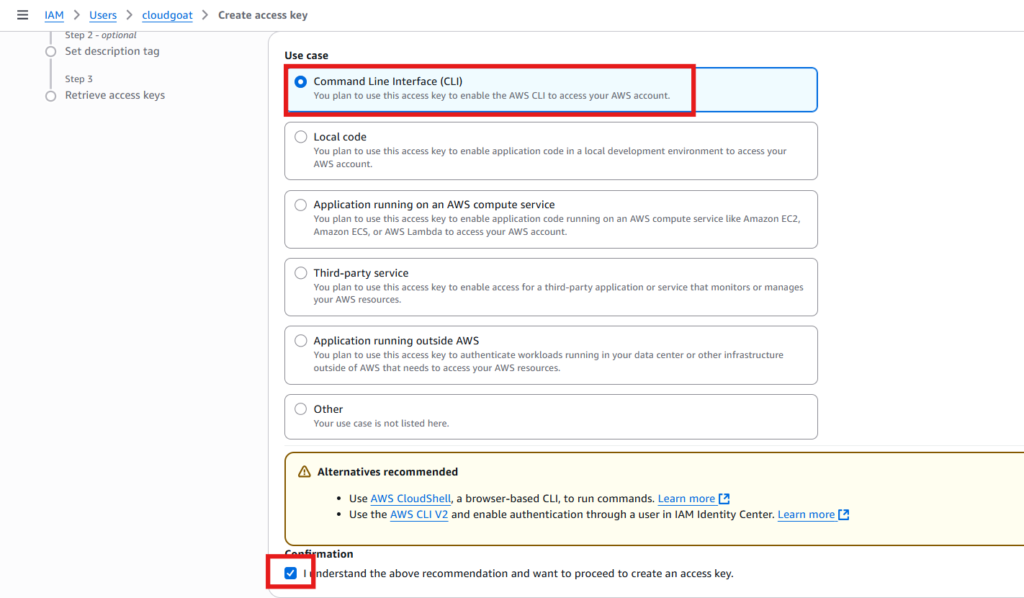
3. Select Command line interface(CLI) click the conformation box and next.
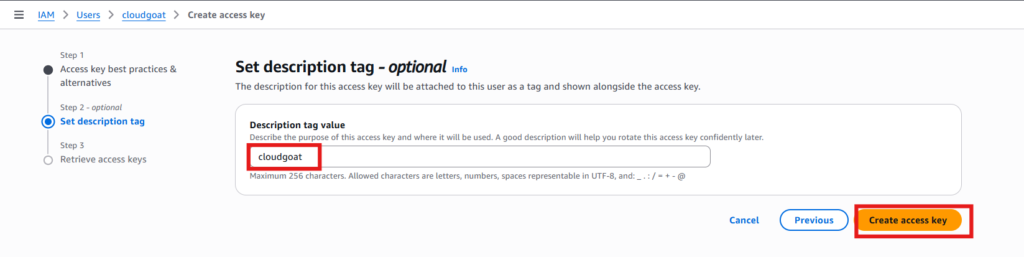
4. Set a description tag(optional Eg:cloudgoat)
5. Copy both the Access Key ID and Secret Access Key.
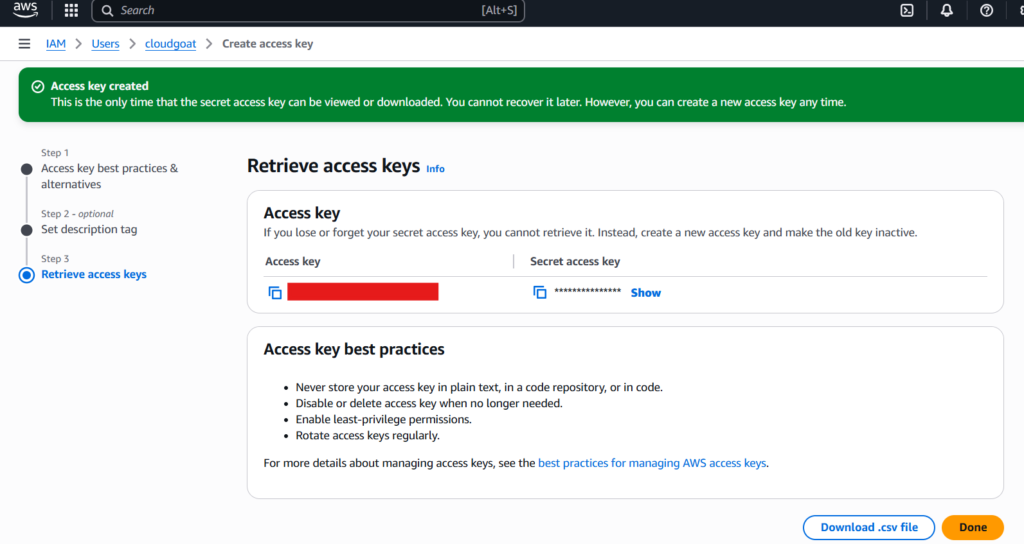
6. Download and store the access keys.
Step 7: Configure AWS CLI with CloudGoat Profile
1. Open a new terminal in Kali Linux
2. Run the following command to create an AWS CLI profile for CloudGoat
aws configure --profile cloudgoat3. Enter the following options
- Access Key & Secret Access Key from the previous step
- Region:
us-east-1 - Output format:
json
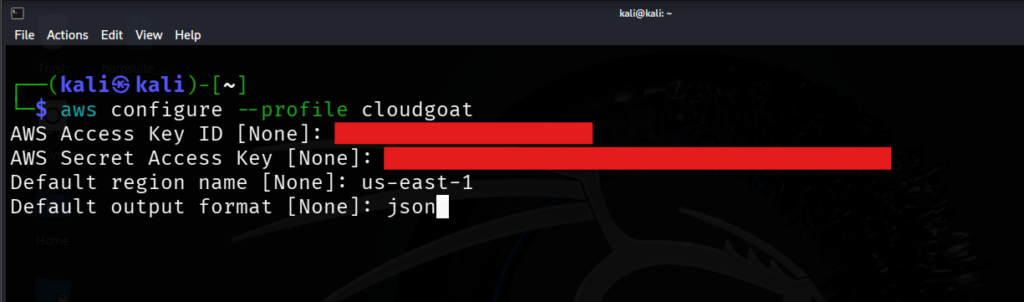
4. Verify it:
aws sts get-caller-identity --profile cloudgoat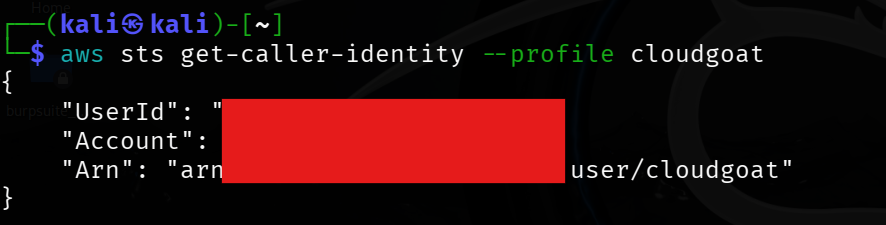
Step 8: Link CloudGoat to AWS Profile
Tell CloudGoat which AWS profile to use:
cloudgoat config awsEnter the profile name you just created (e.g., cloudgoat).

Step 9: Whitelist Your IP Address
To restrict access to the vulnerable environments:
cloudgoat config whitelist --auto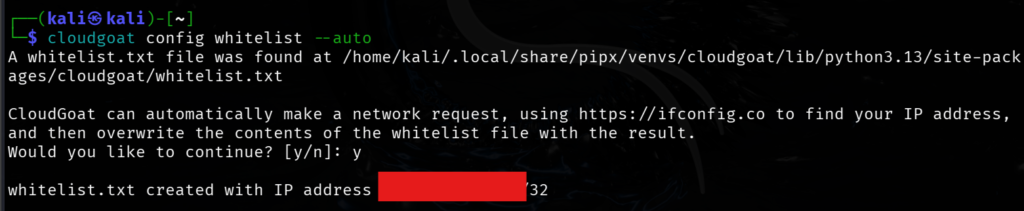
This ensures only your current IP address can access CloudGoat’s deployed resources, improving security.
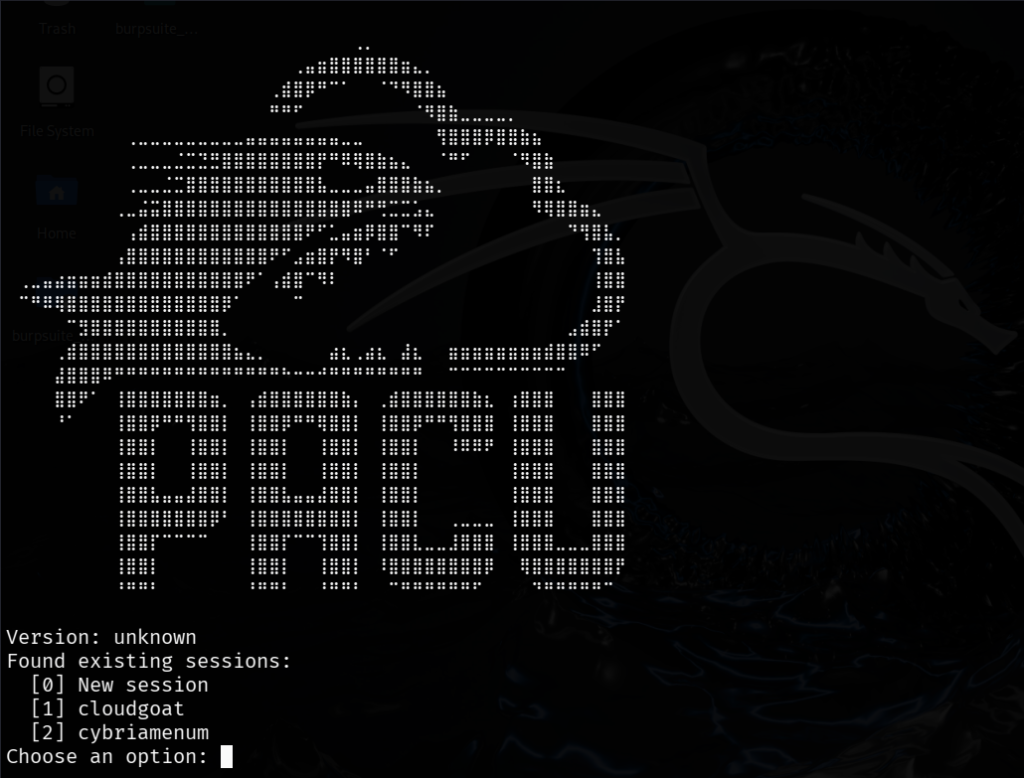
Installing Pacu on Kali Linux
Install Pacu from GitHub in an isolated environment:
pipx install git+https://github.com/RhinoSecurityLabs/pacu.git
After installation, Pacu looks like this (You don’t have any sessions; you need to create a new session).
Check out my previous post
RELATED POSTS
View all